

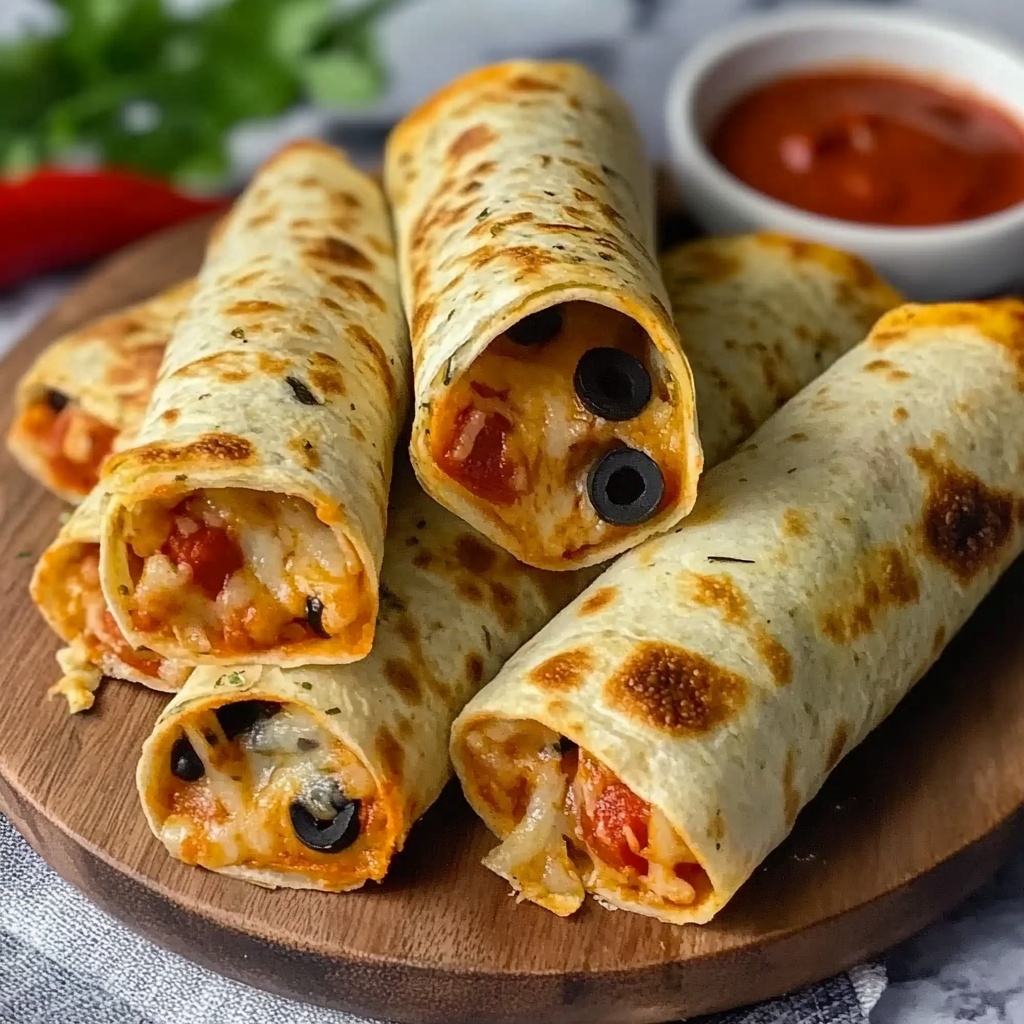
Crispy exterior, gooey cheese, and all your favorite pizza flavors wrapped into one delightful handheld package—Baked Pizza Wraps deliver maximum satisfaction with minimum effort. These tortilla-based treasures transform simple ingredients into a crave-worthy meal that bridges the gap between pizza night and taco Tuesday. A brush of garlic-herb butter adds that extra touch of golden, aromatic perfection that’ll have everyone reaching for seconds. Serve these melty marvels with extra warm pizza sauce on the side for the ultimate dipping experience.
Why You’ll Love This Recipe
These Baked Pizza Wraps combine convenience with irresistible flavor in one easy-to-make package. Here’s why they deserve a permanent spot in your meal rotation:
- Crowd-Pleasing Versatility: Each family member can customize their wrap with favorite toppings while you maintain the same simple cooking method for everyone.
- Crispy-Gooey Texture Balance: The tortillas develop a satisfying crunch outside while protecting that perfect melty cheese center—a texture combination that store-bought pizza pockets can’t match.
- Weeknight Time-Saver: From start to finish in just 30 minutes, these wraps provide homemade pizza flavor without the dough-making or long baking times of traditional pizza.
- Meal-Prep Champion: Make a double batch and freeze unbaked wraps for up to 3 months—just add a few minutes to the baking time when cooking from frozen.
- Kid-Friendly Independence: The simple rolling technique makes this recipe perfect for getting children involved in the kitchen, teaching basic cooking skills while creating dinner together.
Ingredient Notes
Selecting the right components for your Baked Pizza Wraps makes all the difference between good and phenomenal results. Each ingredient plays a crucial role in creating that perfect balance of crispy exterior and gooey, flavorful interior.
- Fajita tortillas: Medium-sized (8-inch) flour tortillas work best as they’re pliable enough to roll without tearing. Look for fresh tortillas that don’t have any dry edges for the best texture when baked.
- Pizza sauce: A thick, high-quality sauce prevents soggy wraps. For homemade flavor, choose brands with simple ingredient lists featuring real tomatoes, or make your own by reducing tomato sauce with Italian herbs.
- Mozzarella cheese sticks: These guarantee that perfect cheese pull and even distribution throughout the wrap. String cheese works beautifully, but you can also use cut strips of block mozzarella for a more authentic flavor.
- Pizza toppings of your choice: Pre-cook any meat toppings (pepperoni works wonderfully without pre-cooking) and chop vegetables finely to ensure even cooking. Classic combinations like ham and pineapple or sausage and mushroom work especially well in these wraps.
- Butter: Use unsalted butter to control the overall saltiness of your Baked Pizza Wraps. Melting it completely ensures even distribution of the herbs and seasonings for that golden, flavorful finish.
- Garlic and herb seasoning: A quality Italian herb blend creates that authentic pizza flavor. For the best aromatic profile, look for mixes containing oregano, basil, and thyme, with garlic as a prominent ingredient.
Step-by-Step Instructions
- Preheat your oven to 375°F (190°C) and lightly grease a baking dish with cooking spray or olive oil to prevent sticking.
- Lay a fajita tortilla flat on your work surface and spread 1-2 tablespoons of pizza sauce evenly across it, leaving about a half-inch border around the edges.
- Place a mozzarella cheese stick at one end of the tortilla, then arrange your chosen toppings in a line alongside it. I find that finely chopped toppings distribute the flavor better throughout each bite.
- Roll the tortilla tightly around the filling, tucking in the sides as you go, and place it seam-side down in your prepared baking dish. Continue with remaining ingredients, arranging the wraps with a small space between each.
- Melt 2 tablespoons of butter in a small bowl, then stir in 1-2 teaspoons of garlic and herb seasoning until well combined. The mixture should be fragrant—this is what gives the wraps that irresistible pizza parlor aroma.
- Brush or drizzle the seasoned butter generously over each wrap, making sure to coat the tops and sides for maximum flavor and that beautiful golden finish.
- Bake for 18-20 minutes, until the wraps are crispy and golden brown with bubbling cheese trying to escape. You’ll know they’re perfect when the tortillas develop those delicious toasted spots.
- Remove from the oven and let rest for 2-3 minutes before serving—the filling will be extremely hot! Serve with extra warmed pizza sauce on the side for dipping.
Remember that these wraps are completely customizable—you can fill them with any combination of toppings you’d typically enjoy on a traditional pizza!
Make Ahead Options
These Baked Pizza Wraps are a meal prep dream for busy weeknights! You can assemble the entire wraps up to 24 hours in advance—simply wrap each one individually in plastic wrap and refrigerate until ready to bake. For longer storage, freeze assembled (unbaked) wraps for up to 3 months in freezer-safe bags. The garlic-herb butter mixture can also be prepared 3 days ahead and stored covered in the refrigerator. When ready to serve, brush thawed wraps with the butter mixture and bake as directed, adding an extra 3-5 minutes if cooking from frozen. This make-ahead approach saves precious time during hectic dinner hours while delivering the same crispy, cheesy perfection your family craves.
Storage & Freezing
These Baked Pizza Wraps are perfect for meal prep and future snacking. With proper storage, you can enjoy their crispy-cheesy goodness well beyond the initial baking.
Refrigerating leftover pizza wraps is simple – allow them to cool completely, then store in an airtight container for up to 3-4 days. To maintain their texture, I recommend reheating them in a 350°F oven for 8-10 minutes rather than microwaving, which can make the tortillas soggy.
For longer storage, these wraps freeze beautifully. You can freeze them either before or after baking. For unbaked wraps, assemble them completely (except for the butter topping), then freeze in a single layer on a baking sheet before transferring to a freezer bag. When ready to enjoy, brush with the seasoned butter and bake directly from frozen, adding 5-7 minutes to the original baking time. Already baked wraps can be frozen for up to 2 months – simply wrap individually in foil, then place in a freezer bag.
The cheese and tortillas in these Baked Pizza Wraps maintain their quality well during freezing, though be aware that some vegetable toppings (like bell peppers or mushrooms) might release extra moisture when thawed. For best results with make-ahead prep, consider slightly undercooking fresh vegetable toppings before assembly.
Variations & Substitutions
These Baked Pizza Wraps are endlessly adaptable to suit your taste preferences, dietary needs, or whatever ingredients you have on hand. Don’t feel locked into the original recipe—get creative and make them your own!
Tortilla alternatives: If you’re out of fajita-sized tortillas, try using larger burrito wraps (just add more filling) or even lavash bread. For a lower-carb option, I’ve had great success with low-carb tortillas or even large lettuce leaves for a completely bread-free version.
Cheese options galore: While mozzarella sticks create that perfect cheese pull, don’t hesitate to experiment with other cheeses. Cheddar adds a sharper flavor, while fontina or provolone offer sophisticated melt. For a dairy-free version, plant-based mozzarella sticks work surprisingly well.
Creative fillings: Move beyond traditional pizza toppings! Try buffalo chicken with blue cheese, BBQ pulled pork with caramelized onions, or even breakfast wraps with scrambled eggs, cheese, and bacon. My family loves a Mediterranean version with feta, olives, and sun-dried tomatoes.
Dietary adaptations: Make these gluten-free by using corn tortillas or gluten-free wraps (though they may be slightly less pliable). For vegan wraps, use dairy-free cheese and load up on roasted vegetables, or try seasoned beans for protein.
Seasoning swaps: No garlic and herb seasoning? Create your own by mixing dried oregano, basil, garlic powder, and a pinch of crushed red pepper. For different flavor profiles, try everything bagel seasoning, ranch seasoning mix, or even a sprinkle of nutritional yeast for an umami boost.
Dipping alternatives: While extra pizza sauce makes a classic dipper, consider offering ranch dressing, garlic aioli, pesto, or even a balsamic glaze to complement your custom wrap creations.
Serving Suggestions
These Baked Pizza Wraps are incredibly versatile and make for a delightful meal any time of day. Here’s how to turn these handheld treats into a complete dining experience!
I love serving these crispy wraps on a large platter with small bowls of additional warm pizza sauce, ranch dressing, and garlic aioli for dipping options. The contrast between the crunchy tortilla exterior and the variety of dipping sauces creates a fun, interactive eating experience that’s perfect for casual gatherings.
For a complete meal, pair your Baked Pizza Wraps with a simple side salad dressed with Italian vinaigrette – the freshness and acidity balance perfectly against the richness of the cheesy wraps. During game nights, I arrange them on a wooden board alongside garlic knots and marinated olives for an Italian-inspired grazing platter that never disappoints.
These wraps make excellent lunchbox items too! Simply wrap them in foil while still warm to maintain their crispy texture, then pack with fresh fruit and vegetable sticks for a balanced meal on the go. My kids especially love finding these in their school lunches – they’re still delicious at room temperature and much more exciting than a standard sandwich.
Tips for the Best Baked Pizza Wraps
- Prevent soggy wraps: Use a light hand with the pizza sauce (1-2 tablespoons is plenty) and leave a border around the edges to stop sauce from leaking during baking.
- Shred your own cheese: I’ve found that when string cheese isn’t available, freshly shredded mozzarella works better than pre-packaged shredded cheese, which contains anti-caking agents that prevent proper melting.
- Secure the wraps: If your tortillas aren’t staying closed, use toothpicks to hold them together during baking (just remember to remove them before serving!).
- Create a crunchier exterior: For extra crispy Baked Pizza Wraps, lightly brush the tortillas with olive oil before adding your fillings – this creates an additional barrier against sogginess.
- Prevent overflow mess: Place wraps at least 1 inch apart in your baking dish to allow air circulation and catch any cheese that might bubble out during baking.
Recipe FAQs
Can I use corn tortillas instead of fajita tortillas?
No, they crack when rolled. Flour tortillas work best.
How do I prevent soggy wraps?
Use minimal sauce and pre-cook wet vegetables.
Can I freeze these pizza wraps?
Yes! Freeze before baking, then add 5 minutes cooking time.
What if I don’t have cheese sticks?
Shredded mozzarella works too—use about ¼ cup per wrap.
Can I make these in an air fryer?
Absolutely! Cook at 350°F for 8-10 minutes.
Is there a way to make these healthier?
Use whole wheat tortillas and part-skim mozzarella.
Irresistible Baked Pizza Wraps: Crispy Homemade Perfection
Crispy exterior, gooey cheese, and all your favorite pizza flavors wrapped into one delightful handheld package—Baked Pizza Wraps deliver maximum satisfaction with minimum effort.
- Prep Time: 10 minutes
- Cook Time: 20 minutes
- Total Time: 30 minutes
- Yield: 4 servings
- Category: Main Dish
- Method: Baking
- Cuisine: Italian
- Diet: Vegetarian
Ingredients
- 4 fajita tortillas
- 1/2 cup pizza sauce
- 4 mozzarella cheese sticks
- your choice pizza toppings
- 2 tablespoons butter
- 1-2 teaspoons garlic and herb seasoning
Instructions
- Preheat your oven to 375°F (190°C) and lightly grease a baking dish with cooking spray or olive oil to prevent sticking.
- Lay a fajita tortilla flat on your work surface and spread 1-2 tablespoons of pizza sauce evenly across it, leaving about a half-inch border around the edges.
- Place a mozzarella cheese stick at one end of the tortilla, then arrange your chosen toppings in a line alongside it.
- Roll the tortilla tightly around the filling, tucking in the sides as you go, and place it seam-side down in your prepared baking dish.
- Melt 2 tablespoons of butter in a small bowl, then stir in 1-2 teaspoons of garlic and herb seasoning until well combined.
- Brush or drizzle the seasoned butter generously over each wrap.
- Bake for 18-20 minutes, until the wraps are crispy and golden brown.
- Remove from the oven and let rest for 2-3 minutes before serving.
Notes
- Prevent soggy wraps: Use a light hand with the pizza sauce and leave a border around the edges.
- Shred your own cheese: Freshly shredded mozzarella works better than pre-packaged shredded cheese.
- Secure the wraps: Use toothpicks to hold them together if they’re not staying closed.
- Create a crunchier exterior: Lightly brush the tortillas with olive oil before filling.
- Prevent overflow mess: Place wraps at least 1 inch apart in your baking dish.













