

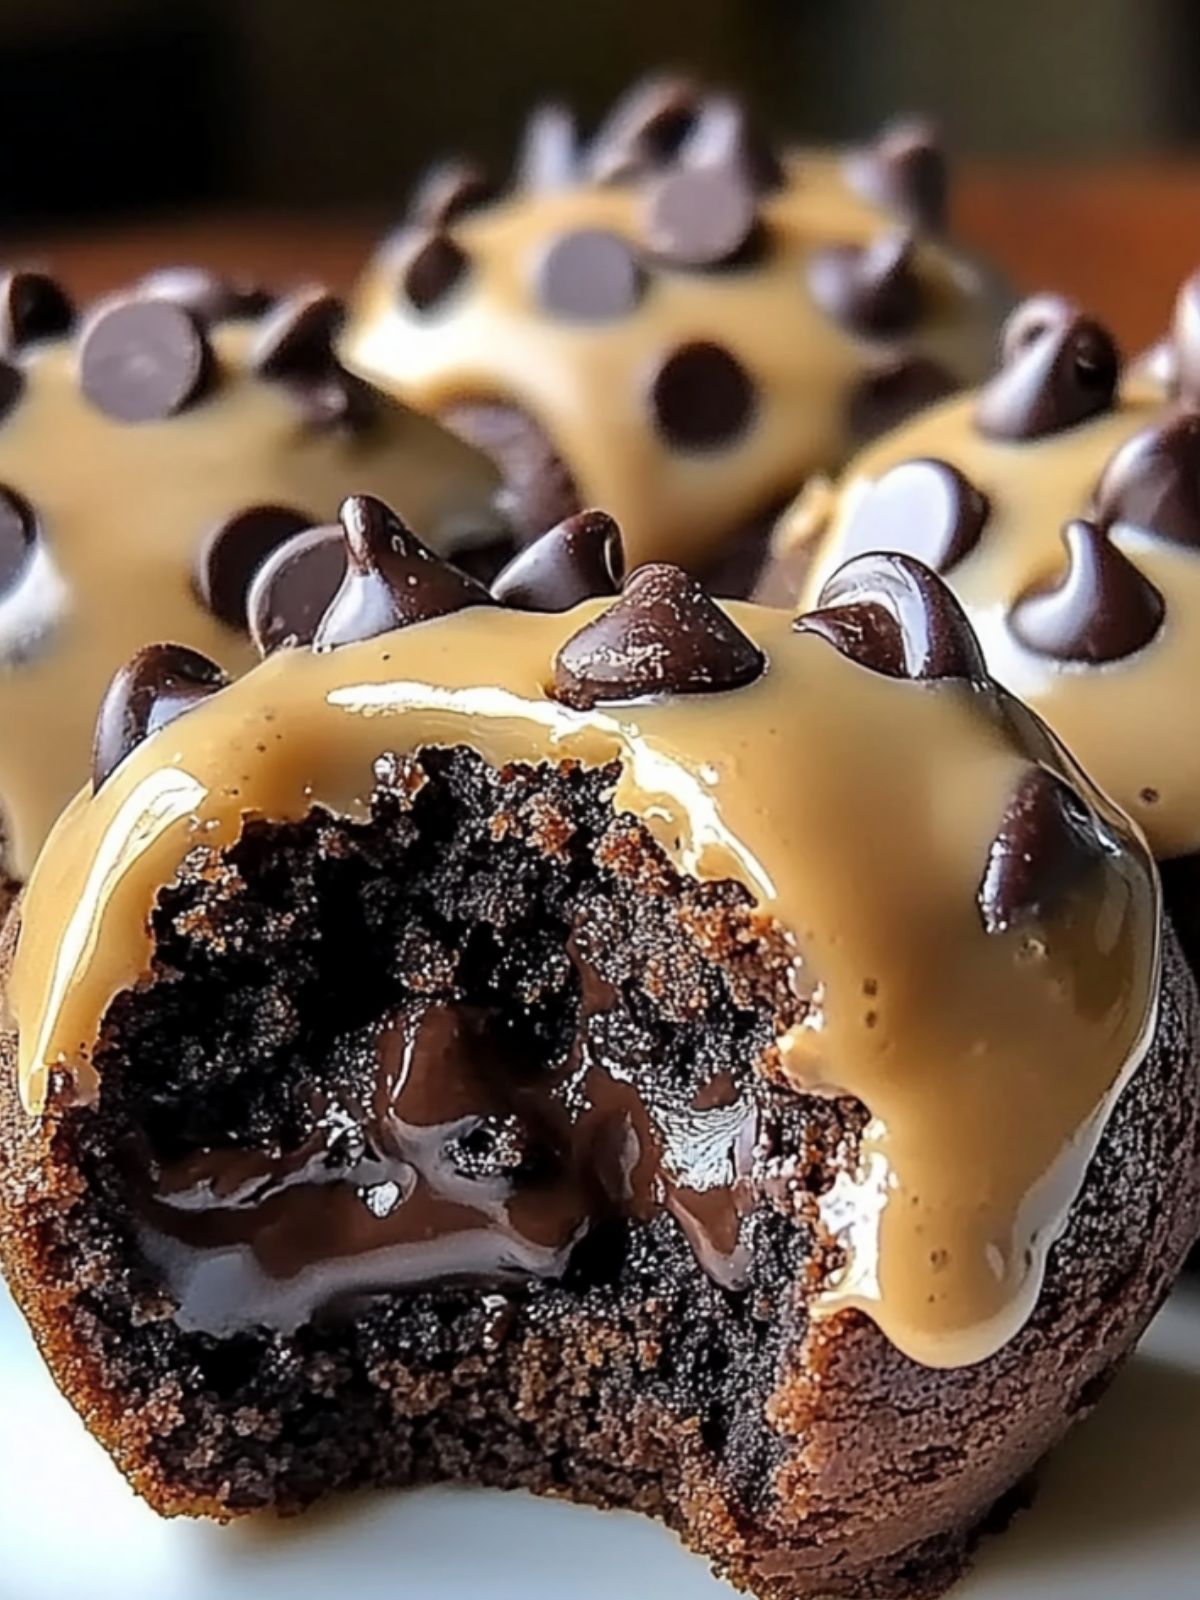
I still remember the first time I made these Chocolate Chip Cookie Dough Brownie Bombs – it was for my sister’s birthday gathering last summer when I wanted something that would truly wow everyone without keeping me trapped in the kitchen all day. The moment I bit into that first brownie bomb, with its fudgy brownie base, sweet cookie dough center, and smooth chocolate coating, I knew I’d discovered something special that I’d be making for years to come. If you’re also a fan of impressive chocolate desserts, check out my Chocolate Raspberry Cake or Zucchini Brownies – both deliver that same wow factor with surprisingly simple preparation .
I’ve been perfecting this recipe ever since, and I’m almost embarrassed to admit how simple it is given the impressive results. These little bites of heaven combine the best of both worlds – the rich intensity of brownies with the irresistible joy of cookie dough (made safe to eat, of course). Whether you’re hosting a party or just treating yourself after a long week, these brownie bombs deliver maximum flavor with minimal effort.
What I love most about this recipe is its versatility. While they’re perfect as-is with a sprinkle of colorful jimmies on top, I’ve experimented with white chocolate coatings, crushed nuts, and even a drizzle of caramel. Each variation offers a slightly different experience, but they all maintain that moment of pure bliss when you bite through the chocolate shell into the soft cookie dough center.

Continue Your Dessert Mashup Journey:
- Brown Butter Pumpkin Chocolate Chip Cookies – Classic cookies with an autumn twist
- Chocolate Zucchini Bread – The perfect balance of cake-like texture and chocolate intensity
- Mint Chocolate Chip Ice Cream – Refreshing counterpoint to serve alongside rich chocolate desserts
Why You’ll Love This Recipe
- Crowd-Pleasing Combination: I’ve never met anyone who could resist the magical duo of brownies and cookie dough. These two beloved treats come together to create something greater than the sum of their parts.
- Make-Ahead Friendly: I often prepare these a day or two before I need them. The flavors actually deepen with a little time, making them perfect for planning ahead for gatherings.
- Customizable Creation: I love switching up the mix-ins and coatings. From rainbow sprinkles for birthday celebrations to crushed peppermint for holiday gatherings, these brownie bombs transform to suit any occasion.
- No Special Equipment Needed: I designed this recipe to be accessible for any home baker. If you can mix ingredients and roll balls, you can make these impressive treats without fancy tools.
- Perfect Portion Control: Each little bomb delivers the perfect two-bite dessert experience. I find them ideal for buffet tables or dessert platters where guests appreciate easy-to-eat options.

Ingredients for This Recipe
- Brownie Mix: The foundation that provides that rich, fudgy base. I prefer a dark chocolate variety for deeper flavor, but any high-quality box mix works beautifully.
- Unsalted Butter: The creamy backbone that binds everything together. I select a high-quality brand for richness and flavor; room temperature ensures proper incorporation.
- Brown Sugar: Brings moisture and caramel undertones to the cookie dough. I always pack it firmly when measuring for consistent sweetness and texture.
- Granulated Sugar: Provides the classic sweetness and structure in traditional cookie dough. The fine crystals create that perfect cookie dough mouthfeel we all crave.
- Milk: Adds just enough moisture to achieve that perfect cookie dough consistency. I typically use whole milk for richness, but any variety works.
- Vanilla Extract: The aromatic essence that elevates both brownie and cookie dough flavors. I always use pure extract rather than imitation for that genuine warmth.
- All-Purpose Flour: Creates the structure for our safe-to-eat cookie dough. I heat-treat mine first by microwaving or baking to eliminate any food safety concerns.
- Mini Chocolate Chips: These tiny morsels distribute perfectly throughout the dough for chocolate in every bite. Their small size prevents them from tearing the dough when rolling.
- Chocolate Candy Melts: Creates that satisfying chocolate shell that holds everything together. I prefer these over regular chocolate for their easy melting and setting properties.
- Sprinkles: The optional but delightful finishing touch. I love how they add a pop of color and fun to these sophisticated little treats.
How to Make This Recipe

- Prepare the Brownies: Follow the box instructions to bake a batch of brownies in an 8×8 or 9×9 inch pan. I always slightly underbake them by about 2 minutes for a fudgier texture. Cool completely.
- Heat-Treat the Flour: Spread flour on a baking sheet and bake at 350°F for 5-7 minutes, or microwave in 30-second bursts until it reaches 165°F. This eliminates any bacteria concerns. Cool before using.
- Make the Cookie Dough: In a large bowl, cream together softened butter and both sugars until light and fluffy. The mixture should look almost whipped and pale in color, about 3 minutes of mixing.
- Add Wet Ingredients: Mix in milk and vanilla extract until fully incorporated. The mixture will look slightly curdled at first but will come together beautifully.
- Incorporate Dry Ingredients: Gently fold in the heat-treated flour until just combined. Overmixing here can make the dough tough, so I use a light hand with a spatula.
- Add Chocolate Chips: Fold in mini chocolate chips until evenly distributed. The dough should now have that classic cookie dough appearance with chips throughout.
- Crumble the Brownies: Break the cooled brownies into fine crumbs in a large bowl. I find using my hands works best to achieve that perfect crumbly texture.
- Form the Centers: Scoop about 1 tablespoon of cookie dough and flatten slightly. Place on a parchment-lined baking sheet. Repeat with remaining dough, then freeze for 15 minutes.
- Create the Bombs: Take a tablespoon of brownie crumbs and press around each cookie dough center, forming a ball that completely encases the dough. Roll between your palms to smooth.
- Chill Again: Place the formed balls back on the baking sheet and refrigerate for at least 30 minutes. This crucial step ensures they stay intact during dipping.
- Melt the Chocolate: Gently melt candy melts in 30-second microwave intervals, stirring between each until smooth. I find a deeper bowl works best for dipping.
- Dip the Bombs: Using two forks, dip each ball into melted chocolate, allowing excess to drip off. The chocolate should be fluid but not too hot to melt the centers.
- Add Sprinkles: While the chocolate is still wet, add sprinkles if desired. Work quickly as the candy melts set faster than regular chocolate.
- Set and Enjoy: Place dipped bombs back on parchment paper and let set completely, about 30 minutes at room temperature or 15 minutes in the refrigerator.
Expert Cooking Tips
- Work in Batches: I keep most of the brownie bombs refrigerated while dipping just a few at a time. Cold centers prevent melting and maintain that perfect layered effect.
- For Super Smooth Coating: I add a teaspoon of coconut oil to the melting chocolate for a thinner consistency that creates a professional-looking finish without thickness or bubbles.
- Prevent Cracking: I let the chocolate-dipped bombs set at room temperature rather than rushing them in the refrigerator. This slower setting prevents the chocolate shell from cracking.
- For Perfect Spheres: I briefly roll each ball between warm palms after the initial chilling. The slight warmth smooths any imperfections before the final refrigeration and dipping.
- Create a Dipping Station: I position my melted chocolate, cold brownie bombs, and decorated tray in a line. This assembly-line approach makes the process flow seamlessly with minimal mess.
Proper Storage
- Room Temperature: Enjoy within 2 days when stored in an airtight container. The flavors meld beautifully after the first 24 hours.
- Refrigerator Storage: Keep for up to 1 week in a sealed container. I place parchment between layers to prevent sticking or damage to the chocolate coating.
- Freezer Option: Store uncoated brownie bombs for up to 3 months. Thaw in refrigerator overnight before dipping in chocolate for that fresh-made quality.
- Avoid Moisture: Keep away from heat sources or humid environments which can cause sweating or blooming on the chocolate coating.
Variations and Substitutions
- Peanut Butter Paradise: I sometimes swap ¼ cup of flour for powdered peanut butter in the cookie dough and use peanut butter chips instead of chocolate chips. The salty-sweet combination is irresistible.
- Mint Chocolate Madness: Adding ¼ teaspoon of mint extract to the cookie dough creates a refreshing twist. I pair this with a sprinkle of crushed peppermint on top of the chocolate coating.
- Birthday Cake Version: White chocolate chips and rainbow sprinkles in the cookie dough transform these into celebration-worthy treats. I use vanilla cake mix instead of brownies for the outer layer.
- Dairy-Free Adaptation: I’ve successfully substituted plant-based butter and milk with excellent results. Just be sure to check that your chocolate melts are also dairy-free.
- Caramel Surprise: Pressing a small indent in the cookie dough and adding a bit of thick caramel before enclosing in brownie creates an extra layer of delicious surprise.

What Goes with This Recipe
- Fresh Berries: A side of strawberries or raspberries provides a bright, acidic contrast that balances the richness of these indulgent treats.
- Coffee or Espresso: The bitter notes in a well-brewed coffee cut through the sweetness perfectly. I find this pairing especially satisfying after dinner.
- Vanilla Ice Cream: Serving these slightly warmed (10 seconds in microwave) alongside a scoop of quality vanilla ice cream creates a deconstructed brownie à la mode experience.
- Glass of Milk: Classic for a reason! The cool creaminess helps cleanse the palate between bites of these rich chocolate bombs.
- Salted Nuts: A small dish of lightly salted almonds or cashews offers textural contrast and helps balance the sweetness with savory notes.
FAQ
Can I use homemade brownie batter instead of boxed mix? Absolutely! Your favorite brownie recipe works perfectly. Just ensure they’re fudgy rather than cakey.
Is the cookie dough safe to eat? Yes! Heat-treating the flour and using an egg-free dough recipe makes it completely safe.
Why did my chocolate coating crack? Temperature shifts likely caused this. Try setting them at room temperature instead of refrigerating.
Can I make these smaller for a party? Definitely! Half-sized bombs work beautifully for larger gatherings. Reduce dipping chocolate accordingly.
How far in advance can I make these? Up to 3 days ahead. The flavors actually improve after the first day!
PrintChocolate Chip Cookie Dough Brownie Bombs

Indulge in my irresistible Chocolate Chip Cookie Dough Brownie Bombs – decadent treats featuring edible cookie dough wrapped in fudgy brownie crumbs and coated in smooth chocolate. Perfect for parties!
- Prep Time: 40 minutes
- Chilling Time: 45 minutes
- Total Time: 1 hour 25 minutes
- Yield: 18 brownie bombs
Ingredients
- 1 box brownie mix (prepared according to package)
- ½ cup unsalted butter, softened
- ½ cup brown sugar
- ¼ cup granulated sugar
- 2 tablespoons milk
- 1 teaspoon vanilla extract
- 1¼ cups all-purpose flour (heat-treated)
- 1 cup mini chocolate chips
- 2 cups chocolate candy melts
- Sprinkles (optional)
Instructions
- Prepare brownies according to package directions. Cool completely.
- Heat-treat flour by baking at 350°F for 5-7 minutes. Cool.
- Cream butter and sugars until fluffy.
- Add milk and vanilla, then mix in flour.
- Fold in mini chocolate chips.
- Crumble brownies into fine crumbs.
- Form tablespoon-sized cookie dough balls, flatten slightly, and freeze for 15 minutes.
- Wrap each cookie dough piece with brownie crumbs, forming balls.
- Chill formed balls for 30 minutes.
- Melt chocolate candy melts.
- Dip each ball in chocolate, coating completely.
- Add sprinkles if desired.
- Let set before serving.













