

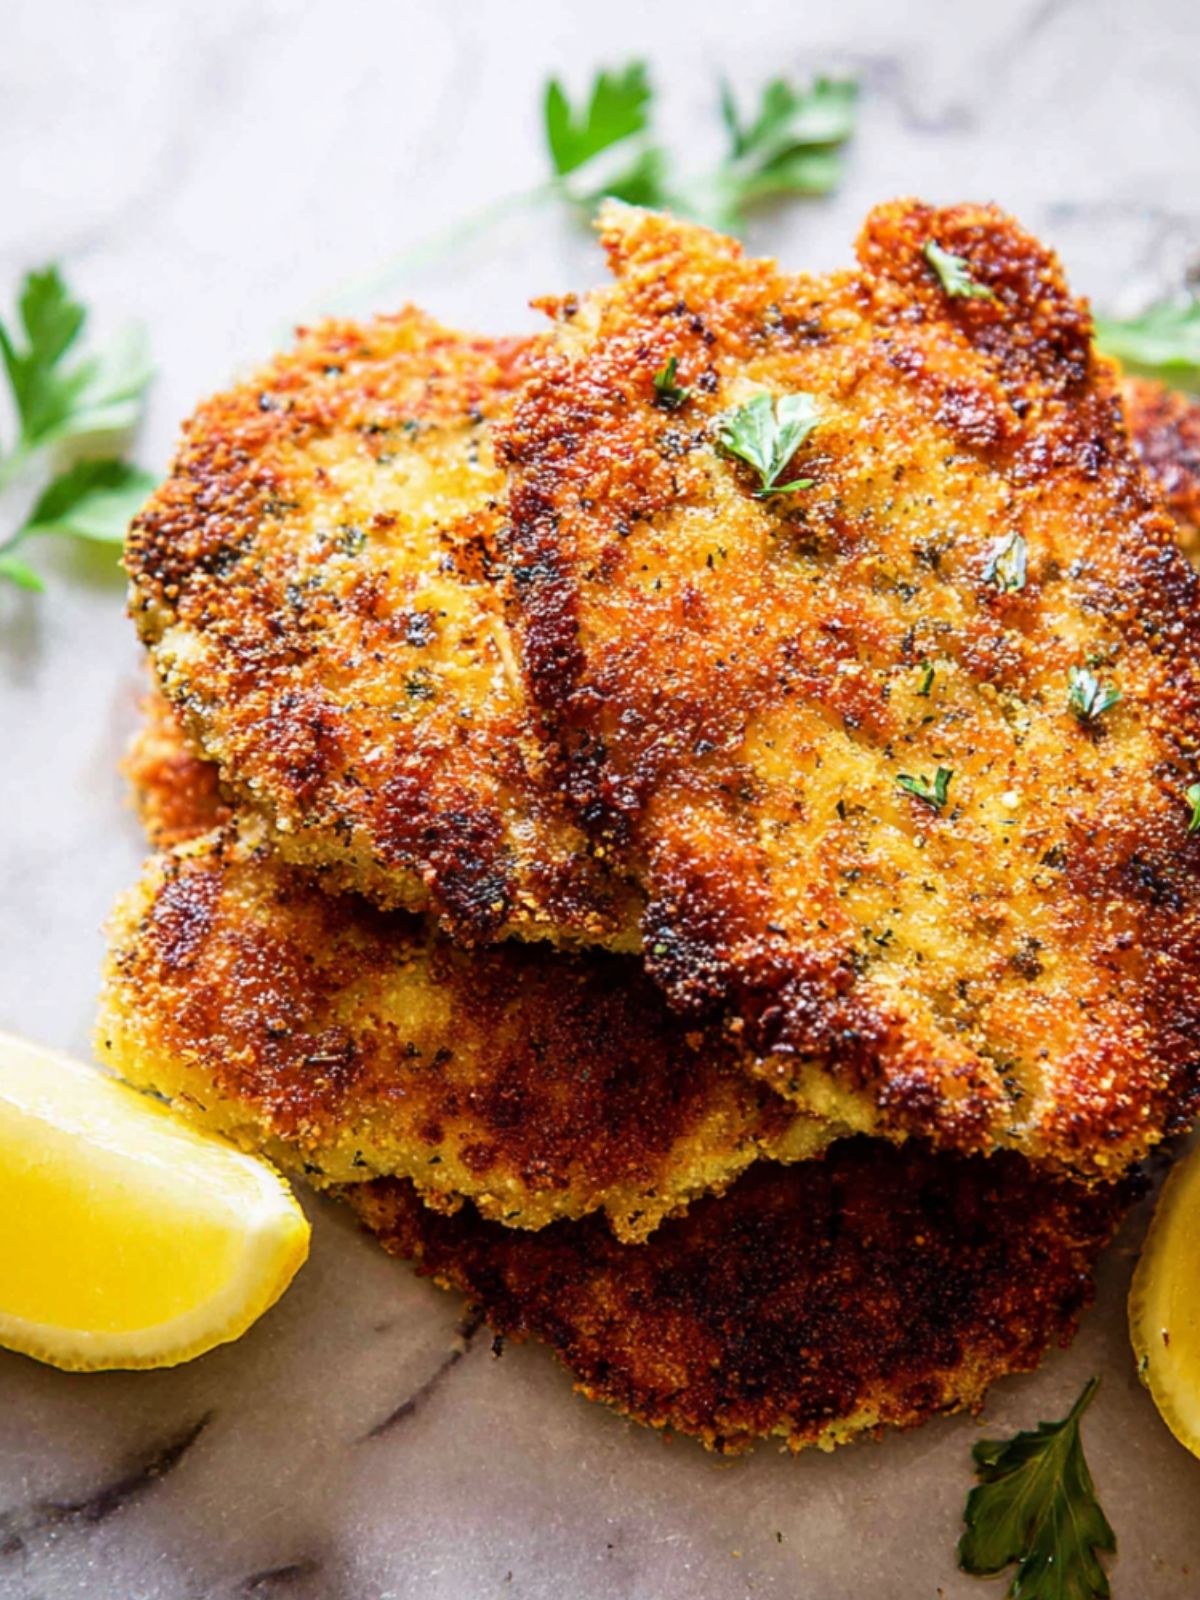
This crispy Italian chicken cutlets recipe captures the essence of cozy fall family gatherings. There’s something magical about the way golden autumn light filters through the kitchen window while the sizzle of olive oil fills the air, signaling that comfort food season has truly arrived. These cutlets embody everything I love about this time of year – the way fresh Italian parsley still brightens from the garden before the first frost, while hearty ingredients like nutty pecorino Romano and aromatic garlic promise the satisfying warmth we crave as temperatures drop. For more cozy fall comfort food that brings that same Italian parsley brightness and aromatic garlic warmth to family gatherings, try our Creamy Garlic Chicken or One Pot Garlic Parmesan Pasta with Spinach and Mushrooms that capture golden autumn magic with satisfying warmth perfect for comfort food season.

More Italian Chicken Ideas You’ll Love
For more Italian chicken favorites, try:
- Baked Chicken Parmesan – Classic comfort food with melted cheese and rich marinara sauce
- Creamy Garlic Parmesan Chicken Pasta Bake – Complete one-dish meal perfect for feeding a crowd
- Garlic Parmesan Chicken – Simple weeknight dinner with bold Italian flavors
- One Pan Creamy Parmesan Chicken Rice – Everything cooks together for easy cleanup
Why You’ll Love These Crispy Italian Chicken Cutlets?
After making these countless times for my family, I can confidently say they’ve become our go-to comfort food that never disappoints. Here’s why:
• Foolproof Frying: The simple pan-frying technique creates perfect results every time, with no special equipment or complicated steps required for restaurant-quality cutlets at home.
• Irresistible Crunch: Each bite delivers that satisfying golden crust that shatters to reveal incredibly tender, juicy chicken that stays moist and flavorful throughout.
• Flavor Powerhouse: The combination of sharp pecorino Romano, aromatic garlic, and fresh parsley creates an Italian-inspired coating that’s absolutely bursting with savory, herbaceous notes.
• Endless Versatility: Serve them over pasta, in sandwiches, with salad, or alongside roasted vegetables – these cutlets adapt beautifully to any meal or occasion.
• Beginner Friendly: With basic ingredients and straightforward techniques, even novice cooks can achieve professional results that will impress family and friends alike.
This recipe transforms ordinary chicken into something extraordinary that brings everyone running to the dinner table.

Ingredients Notes
• Breadcrumbs: I prefer panko for its larger, irregular flakes that create maximum crunch, but homemade breadcrumbs from day-old Italian bread add incredible flavor depth.
• Garlic: I always choose firm, plump cloves with tight skin and no green sprouts, then mince them fine to distribute evenly throughout the coating.
• Fresh Parsley: I look for bright green, crisp flat-leaf parsley with no yellowing edges – it provides a fresh, herbaceous note that dried simply can’t match.
• Pecorino Romano: I buy blocks and grate fresh for the sharpest, most pronounced flavor that perfectly complements the garlic without becoming overpowering or bitter.
• Chicken Breasts: I select breasts that are similar in size and pound them to even ¼-inch thickness for consistent cooking and maximum tenderness throughout.
• Olive Oil: I use a good-quality extra virgin with a mild flavor for frying – it shouldn’t be your most expensive bottle, but avoid anything too bland.
• Eggs: I prefer large, room-temperature eggs that whisk smoothly and create a better adhesive layer for the breadcrumb coating to stick properly.
How to Make Crispy Italian Chicken Cutlets

- Set up your breading station. I arrange three shallow dishes in a row: one with seasoned flour, one with beaten eggs, and one for the breadcrumb mixture.
- Create the seasoned breadcrumb coating. In the third dish, I combine the breadcrumbs, minced garlic, parsley, Italian seasoning (if using), and 1 cup of the grated cheese. Mix everything together until evenly distributed.
- Prepare the chicken. If your chicken breasts aren’t already thinly sliced, pound them between plastic wrap to an even ¼-inch thickness. Season both sides lightly with salt and pepper.
- Bread each cutlet using the three-step method. Dredge each piece first in flour, shaking off excess, then dip in beaten egg, and finally press firmly into the breadcrumb mixture. I make sure to coat both sides completely.
- Heat the oil for frying. Pour about ¼ inch of olive oil into a large skillet and heat over medium-high heat until it shimmers and a breadcrumb dropped in sizzles immediately. Adjust heat as needed to maintain proper temperature.
- Fry the cutlets in batches. I cook 2-3 cutlets at a time for 3-4 minutes per side until golden brown and crispy. Don’t flip too early – let the first side develop a proper crust. The internal temperature should reach 165°F.
- Drain and finish. Transfer cooked cutlets to a paper towel-lined plate and immediately sprinkle with the remaining ¼ cup cheese while they’re still hot. Serve immediately for the crispiest results.
Expert Tips for Perfect Chicken Cutlets
- Keep Your Oil Temperature Steady I test the oil with a small pinch of breadcrumbs – if they sizzle vigorously but don’t burn immediately, the temperature is perfect. Too hot and your coating burns before the chicken cooks through.
- Use the “Dry Hand, Wet Hand” Method Keep one hand for dry ingredients (flour and breadcrumbs) and the other for wet (eggs) to prevent your fingers from getting coated in breading. This simple trick keeps your breading station clean and efficient.
- Press Firmly for Maximum Adhesion I gently but firmly press each cutlet into the breadcrumb mixture, then let them rest for 2-3 minutes before frying. This helps the coating stick better and creates that restaurant-quality crust.
- Don’t Overcrowd the Pan Overcrowding the pan drops the oil temperature, resulting in soggy cutlets instead of crisp ones. I always give each piece plenty of space to ensure even browning and maximum crispiness.
- Finish with Fresh Cheese While Hot Sprinkling that final bit of pecorino or parmesan on the hot cutlets creates an extra layer of flavor and helps any steam escape. The residual heat slightly melts the cheese for an irresistible finishing touch.
- Keep Cooked Cutlets Warm in the Oven If serving a crowd, I place finished cutlets on a wire rack set over a baking sheet in a 200°F oven to stay warm and crispy while I finish the remaining batches.
Storage Tips for Crispy Italian Chicken Cutlets
- Refrigerate Properly for Best Results I store cooked cutlets in the refrigerator for up to 3 days, loosely covered to prevent moisture buildup.
- Freeze for Long-Term Storage Wrap individual cutlets in plastic wrap, then place in freezer bags for up to 3 months of fresh taste.
- Reheat in the Oven for Crispiness I reheat cutlets at 375°F for 10-12 minutes on a wire rack to restore that perfect golden crunch.
- Store Uncooked Breaded Cutlets Breaded but uncooked cutlets freeze beautifully for up to 2 months and cook directly from frozen perfectly.
- Avoid the Microwave Microwaving makes the crispy coating soggy and chewy – always use the oven or toaster oven for reheating instead.
- Use Parchment Paper for Separation I layer cutlets between parchment paper when storing to prevent sticking and maintain that beautiful golden coating.
Variations and Substitutions for Crispy Italian Chicken Cutlets
- Gluten-Free Option Replace regular breadcrumbs with almond flour for gluten-free cutlets that deliver extra nuttiness while maintaining that perfectly satisfying crunch.
- Dairy-Free Version Substitute nutritional yeast for cheese to create dairy-free cutlets with umami depth, though you’ll lose some of the rich saltiness.
- Different Proteins Try pork or veal cutlets instead of chicken for much richer flavor profiles that pair beautifully with the garlic-herb coating.
- Healthier Baked Method Bake at 425°F for much healthier results with less oil, though you’ll sacrifice some of the signature crispy texture.
- Cheese Alternatives Swap pecorino for sharp cheddar or gruyere to create completely different flavor profiles while maintaining the same rich finish.
- Juicier Cut Choice Use chicken thighs instead of breasts for much juicier, more flavorful cutlets that stay tender even if slightly overcooked.

Perfect Pairings and Serving Ideas for Crispy Italian Chicken Cutlets
- Classic Pasta Pairing Serve over spaghetti with marinara sauce for classic chicken parmigiana that perfectly balances the crispy coating with tangy tomato acidity.
- Fresh Salad Balance Pair with arugula salad dressed in lemon vinaigrette to cut through the richness while adding peppery freshness and bright acidity.
- Wine Complement A crisp Pinot Grigio perfectly complements the garlic and herbs while cleansing the palate between bites of the rich coating.
- Vegetable Side Contrast Roasted broccoli with fresh lemon brightens the plate and provides fiber contrast to balance the indulgent fried chicken’s rich flavors.
- Sandwich Application Layer in crusty Italian rolls with fresh tomatoes and basil for incredibly satisfying sandwiches that showcase the cutlet’s crispy texture.
- Dipping Sauce Enhancement Serve alongside marinara or lemon aioli for dipping to enhance the Italian flavors while adding extra moisture and tangy contrast.
Frequently Asked Questions for Crispy Italian Chicken Cutlets
Q: Why does my breading fall off during frying? A: Let breaded cutlets rest 5 minutes before frying for better adhesion.
Q: How do I know when the oil is hot enough? A: Drop breadcrumbs in oil – they should sizzle immediately without burning.
Q: Can I prepare these cutlets ahead of time? A: Bread cutlets up to 4 hours early and refrigerate uncovered.
Q: What if my chicken breasts are too thick? A: Pound between plastic wrap to even ¼-inch thickness for consistent cooking.
Q: Why are my cutlets greasy instead of crispy? A: Oil temperature too low – increase heat and don’t overcrowd pan.
Q: Can I bake these instead of frying them? A: Yes, bake at 425°F for 15-20 minutes, flipping once halfway.
PrintCrispy Italian Chicken Cutlets (Best Ever!)

Learn how to make crispy Italian chicken cutlets with golden breadcrumb coating. Easy pan-fried recipe with garlic, parmesan & herbs. Ready in 40 minutes!
- Prep Time: 20 minutes
- Cook Time: 20 minutes
- Total Time: 40 minutes
- Yield: 4-6 servings
Ingredients
- 3 cups homemade breadcrumbs or panko
- 3 cloves garlic finely minced or grated
- 2 tablespoons fresh Italian flat leaf parsley finely minced
- ½ teaspoon dried Italian seasoning optional
- 1 ¼ cup finely grated pecorino Romano or parmesan cheese (1 cup for breading, ¼ cup for finishing)
- kosher salt to taste
- freshly ground black pepper to taste
- 3 large eggs
- 1 cup all purpose flour
- 2 lbs boneless skinless chicken breasts thinly sliced
- extra virgin olive oil for frying
Instructions
- Set up your breading station. I arrange three shallow dishes in a row: one with seasoned flour, one with beaten eggs, and one for the breadcrumb mixture.
- Create the seasoned breadcrumb coating. In the third dish, I combine the breadcrumbs, minced garlic, parsley, Italian seasoning (if using), and 1 cup of the grated cheese. Mix everything together until evenly distributed.
- Prepare the chicken. If your chicken breasts aren’t already thinly sliced, pound them between plastic wrap to an even ¼-inch thickness. Season both sides lightly with salt and pepper.
- Bread each cutlet using the three-step method. Dredge each piece first in flour, shaking off excess, then dip in beaten egg, and finally press firmly into the breadcrumb mixture. I make sure to coat both sides completely.
- Heat the oil for frying. Pour about ¼ inch of olive oil into a large skillet and heat over medium-high heat until it shimmers and a breadcrumb dropped in sizzles immediately. Adjust heat as needed to maintain proper temperature.
- Fry the cutlets in batches. I cook 2-3 cutlets at a time for 3-4 minutes per side until golden brown and crispy. Don’t flip too early – let the first side develop a proper crust. The internal temperature should reach 165°F.
- Drain and finish. Transfer cooked cutlets to a paper towel-lined plate and immediately sprinkle with the remaining ¼ cup cheese while they’re still hot. Serve immediately for the crispiest results.













