

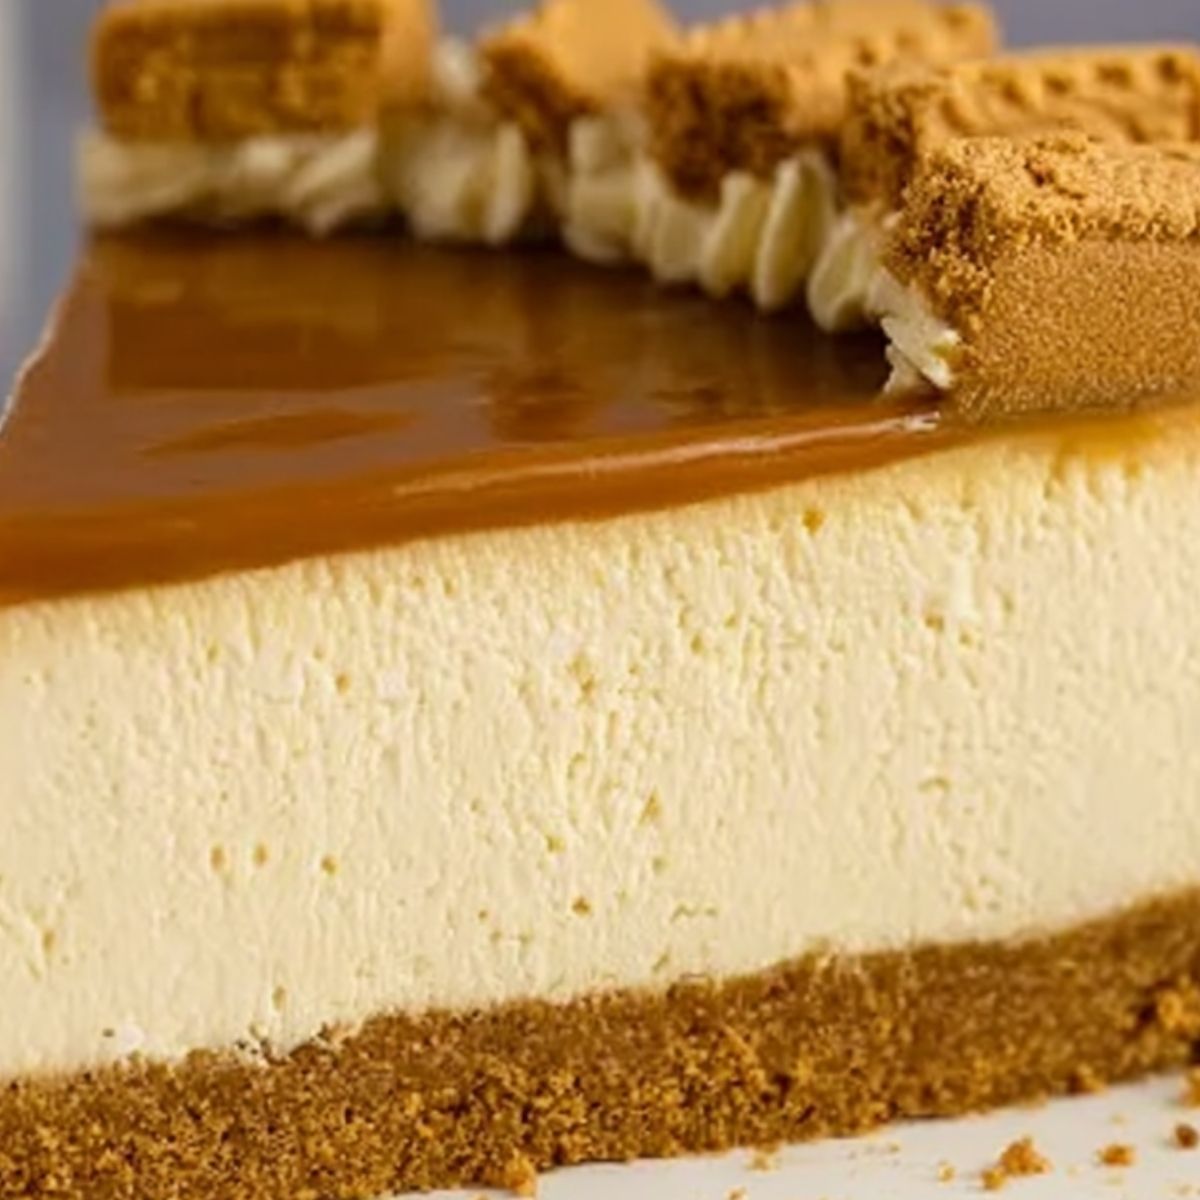
This caramel-infused Lotus Biscoff No-Bake Cheesecake transforms the beloved spiced cookies into a decadent dessert experience without ever turning on the oven. Each spoonful delivers the signature warm cinnamon-caramel notes of Biscoff, beautifully balanced against a velvety cream cheese filling that melts effortlessly on the tongue. The contrast between the buttery cookie crust and cloud-like filling creates an irresistible texture play that makes this dessert truly special. Finished with a sprinkle of crushed cookies on top, it’s a show-stopping treat that pairs wonderfully with a steaming cup of coffee.
Why You’ll Love This Recipe
This no-bake wonder combines simplicity with spectacular flavor, making it perfect for both special occasions and weeknight cravings.
- Foolproof Success: The no-bake method eliminates common cheesecake disasters like cracking or sinking, delivering perfect results even for novice bakers.
- Texture Perfection: The contrast between the crunchy Lotus cookie base and the silky-smooth cheesecake filling creates an irresistible sensory experience with every bite.
- Make-Ahead Marvel: Prepared up to two days in advance, this cheesecake actually improves with overnight chilling as the flavors deepen and meld together.
- Pantry-Friendly: Using readily available ingredients means spontaneous dessert cravings can be satisfied without special shopping trips or hard-to-find components.
- Crowd Pleaser: The distinctive caramelized spice flavor of Biscoff appeals to sophisticated palates while remaining familiar enough for even picky eaters to enjoy.
- Temperature Flexible: Unlike traditional cheesecake that must be served cold, this version tastes equally delicious straight from the refrigerator or after sitting at room temperature for 20 minutes.
Ingredient Breakdown with Tips
The magic of this No-Bake Lotus Biscoff Cheesecake lies in the quality and proper handling of each ingredient. Every component plays a crucial role in creating that perfect balance of flavor, structure, and indulgent texture that makes this dessert unforgettable.
- Lotus Biscoff cookies: These caramelized spice cookies provide both the distinctive flavor profile and the structural base of the cheesecake. For the best texture in your crust, pulse them to fine crumbs but avoid over-processing into powder.
- Melted butter: Acts as the binding agent for the cookie crust, ensuring it holds together when sliced. Unsalted butter works best, but salted butter can add a pleasant contrast to the sweet cookies if preferred.
- Cream cheese: Forms the creamy foundation of the filling. Always use full-fat cream cheese at room temperature (30 minutes on the counter) for a lump-free, silky-smooth texture that blends perfectly with other ingredients.
- Powdered sugar: Dissolves seamlessly into the filling, preventing the grainy texture that can occur with granulated sugar. Sifting before measuring eliminates any lumps for the smoothest possible cheesecake.
- Biscoff cookie butter: The star ingredient that intensifies the signature caramelized spice flavor throughout the cheesecake. The smooth variety works best for mixing, but crunchy cookie butter can add interesting texture if you prefer.
- Heavy whipping cream: Provides essential structure and lightness to the filling. For perfect peaks, chill both the cream and mixing bowl in the refrigerator for 15 minutes before whipping, and always use cream with at least 36% fat content.
How to Make Irresistible Lotus Biscoff No-Bake Cheesecake
- Crush 250 grams of Lotus Biscoff cookies into fine crumbs using a food processor or by placing them in a sealed bag and rolling with a rolling pin. Mix thoroughly with 5 tablespoons of melted butter until the mixture resembles wet sand.
- Press the cookie mixture firmly into the bottom of a 9-inch springform pan, creating an even layer. I find using the bottom of a measuring cup helps create a perfectly smooth, compact crust. Refrigerate while preparing the filling.
- Beat the room-temperature cream cheese, powdered sugar, and Biscoff cookie butter together in a large bowl until completely smooth and fluffy, about 3 minutes. Make sure to scrape down the sides of the bowl several times to avoid any lumps.
- Whip the heavy cream in a separate chilled bowl until stiff peaks form. The cream should be cold from the refrigerator for the best volume and stability.
- Gently fold the whipped cream into the cream cheese mixture using a rubber spatula, working in thirds. Maintain a light touch to preserve as much air as possible in the mixture—this is what gives the cheesecake its cloudlike texture.
- Pour the filling over the chilled crust and spread evenly with an offset spatula. Tap the pan gently on the counter a few times to release any trapped air bubbles.
- Crush the remaining 50 grams of Lotus cookies and sprinkle over the top of the cheesecake. For an extra touch of indulgence, warm the remaining cookie butter slightly and drizzle it across the surface in a decorative pattern.
- Refrigerate the cheesecake for at least 6 hours, but preferably overnight. The longer it chills, the more the flavors will develop and the firmer the texture will become.
Make-Ahead Tips for No-Bake Lotus Biscoff Cheesecake
This No-Bake Lotus Biscoff Cheesecake is meal prep perfection for busy home cooks! The entire cheesecake can be prepared up to 3 days ahead and stored covered in the refrigerator, where it actually improves as the flavors meld together beautifully. You can also prep components separately—make the cookie crust up to 2 days in advance (wrap tightly in plastic wrap), and prepare the cream cheese filling 24 hours ahead (store covered). For optimal presentation, add the final cookie crumble garnish and cookie butter drizzle just before serving to maintain that perfect textural contrast. Simply remove from the fridge 15-20 minutes before slicing for the cleanest cuts, and you’ll have an impressive dessert ready with zero last-minute stress.
Tips for the Best Irresistible Lotus Biscoff No-Bake Cheesecake
These simple tricks will elevate your No-Bake Lotus Biscoff Cheesecake from good to absolutely unforgettable:
- Temperature matters: Make sure your cream cheese is fully at room temperature before mixing. I’ve found cold cream cheese creates stubborn lumps that never fully incorporate into the smooth filling.
- Perfect crust texture: For the ideal crust consistency, crush your Lotus cookies until they’re fine but still have some texture. Too powdery and the crust becomes dense; too chunky and it won’t hold together when sliced.
- Whipped cream technique: Whip the heavy cream just until stiff peaks form—no further! Over-whipping can make your filling grainy instead of silky smooth.
- Chill for stability: After assembling your cheesecake, refrigerate for at least 6 hours, though I’ve noticed the flavor intensifies beautifully after a full 24 hours as the Biscoff cookie butter fully infuses the filling.
- Cookie butter shortcuts: If your Biscoff cookie butter is too firm to drizzle, microwave it for 10-15 seconds. For extra decadence, mix a tablespoon of heavy cream into the warmed cookie butter before drizzling.
Variations & Substitutions
Don’t have all the ingredients or want to put your own spin on this no-bake wonder? This cheesecake is wonderfully adaptable while still maintaining that irresistible Biscoff appeal.
Dairy-free version: Replace the cream cheese with dairy-free cream cheese and swap the heavy cream for full-fat coconut cream (the solid part from a refrigerated can). I’ve tried this for lactose-intolerant friends and they couldn’t tell the difference!
Cookie crust alternatives: Out of Lotus cookies? Graham crackers, digestive biscuits, or even gingersnaps make excellent substitutes while complementing the spiced caramel notes of the Biscoff spread in the filling.
Flavor boosters: For an elevated flavor profile, add 1 teaspoon of vanilla extract or a tablespoon of dark rum to the filling. The subtle complexity works beautifully with the caramelized spice notes.
Topping twists: Beyond crushed cookies, consider topping with chocolate ganache, salted caramel sauce, or fresh berries for visual appeal and flavor contrast. The tartness of raspberries particularly balances the sweet, spiced filling.
Mini cheesecakes: Transform this recipe into individual servings by preparing in a muffin tin lined with paper liners. Perfect for portion control or when hosting dinner parties where plated desserts make a special impression.
Lower sugar option: Reduce the powdered sugar by up to half if you prefer a less sweet dessert. The Biscoff spread and cookies already provide plenty of sweetness, so this adjustment won’t significantly impact the flavor balance.
Storage & Freezing
This Lotus Biscoff No-Bake Cheesecake stores beautifully in the refrigerator for up to 5 days when kept in an airtight container or covered tightly with plastic wrap. The flavors actually continue to develop and meld together over the first 48 hours, making this the perfect make-ahead dessert for special occasions.
For longer storage, this cheesecake freezes exceptionally well for up to 2 months. I recommend freezing individual slices on a parchment-lined baking sheet until solid before wrapping each piece in plastic wrap and storing in freezer bags. This method makes it easy to enjoy just one slice whenever a Biscoff craving strikes! For freezing a whole cheesecake, first chill it completely, then wrap the entire springform pan in several layers of plastic wrap followed by aluminum foil.
To thaw frozen cheesecake, transfer it to the refrigerator and allow 6-8 hours for slices or overnight for a whole cake. For the best texture, avoid thawing at room temperature, as this can make the filling too soft and compromise the structural integrity of your beautiful no-bake creation. The cookie crust may lose a bit of its initial crispness after freezing, but the flavor will remain just as delicious.
Serving Suggestions
This No-Bake Lotus Biscoff Cheesecake is a showstopper on its own, but there are several ways to elevate your serving experience and make it truly memorable.
For an elegant presentation, serve slices on chilled dessert plates with a light dusting of cinnamon or cocoa powder. I love adding a small scoop of vanilla bean ice cream on the side—the contrast between the cold ice cream and the caramelized Biscoff flavors is simply divine. The warm and cool elements play beautifully together, especially when the cheesecake has rested at room temperature for about 10 minutes.
For beverage pairings, this cheesecake shines alongside a strong espresso or cappuccino, as the coffee notes complement the caramelized spice profile of the Biscoff cookies. A dessert wine like Sauternes or a cream sherry also works wonderfully, highlighting the rich, buttery notes in both the crust and filling.
When entertaining, create a dessert board by cutting the cheesecake into smaller portions and arranging them alongside fresh berries, additional Lotus cookies, and small ramekins of warmed cookie butter for dipping. This interactive serving style always impresses guests while showcasing the versatility of this beloved no-bake dessert.
Recipe FAQs
Can I use regular cookies instead of Lotus Biscoff?
Graham crackers work well as a substitute.
How long does this cheesecake need to chill?
At least 6 hours, preferably overnight.
Can I freeze this no-bake cheesecake?
Yes, it freezes beautifully for up to 2 months.
What if I can’t find Biscoff cookie butter?
Speculoos or caramelized cookie butter work similarly.
Is this cheesecake gluten-free?
No, Lotus Biscoff cookies contain wheat.
Can I make this with light cream cheese?
I recommend full-fat for the best texture.
Irresistible Lotus Biscoff No-Bake Cheesecake

This caramel-infused Lotus Biscoff No-Bake Cheesecake transforms the beloved spiced cookies into a decadent dessert experience without ever turning on the oven.
- Prep Time: 20 minutes
- Total Time: 6 hours
- Yield: 8 servings
- Category: Dessert
- Method: No-Bake
- Cuisine: American
- Diet: Vegetarian
Ingredients
- 250 grams Lotus cookies (plus 50 grams for sprinkling)
- 5 tablespoons melted butter
- 450 grams cream cheese
- 3/4 cup powdered sugar
- 1/4 cup + 50 grams Biscoff cookie butter
- 2 cups heavy whipping cream
Instructions
- Crush 250 grams of Lotus Biscoff cookies into fine crumbs using a food processor or by placing them in a sealed bag and rolling with a rolling pin. Mix thoroughly with 5 tablespoons of melted butter until the mixture resembles wet sand.
- Press the cookie mixture firmly into the bottom of a 9-inch springform pan, creating an even layer. I find using the bottom of a measuring cup helps create a perfectly smooth, compact crust. Refrigerate while preparing the filling.
- Beat the room-temperature cream cheese, powdered sugar, and Biscoff cookie butter together in a large bowl until completely smooth and fluffy, about 3 minutes. Make sure to scrape down the sides of the bowl several times to avoid any lumps.
- Whip the heavy cream in a separate chilled bowl until stiff peaks form. The cream should be cold from the refrigerator for the best volume and stability.
- Gently fold the whipped cream into the cream cheese mixture using a rubber spatula, working in thirds. Maintain a light touch to preserve as much air as possible in the mixture—this is what gives the cheesecake its cloudlike texture.
- Pour the filling over the chilled crust and spread evenly with an offset spatula. Tap the pan gently on the counter a few times to release any trapped air bubbles.
- Crush the remaining 50 grams of Lotus cookies and sprinkle over the top of the cheesecake. For an extra touch of indulgence, warm the remaining cookie butter slightly and drizzle it across the surface in a decorative pattern.
- Refrigerate the cheesecake for at least 6 hours, but preferably overnight. The longer it chills, the more the flavors will develop and the firmer the texture will become.
Notes
- Temperature matters: Make sure your cream cheese is fully at room temperature before mixing. I’ve found cold cream cheese creates stubborn lumps that never fully incorporate into the smooth filling.
- Perfect crust texture: For the ideal crust consistency, crush your Lotus cookies until they’re fine but still have some texture. Too powdery and the crust becomes dense; too chunky and it won’t hold together when sliced.
- Whipped cream technique: Whip the heavy cream just until stiff peaks form—no further! Over-whipping can make your filling grainy instead of silky smooth.
- Chill for stability: After assembling your cheesecake, refrigerate for at least 6 hours, though I’ve noticed the flavor intensifies beautifully after a full 24 hours as the Biscoff cookie butter fully infuses the filling.
- Cookie butter shortcuts: If your Biscoff cookie butter is too firm to drizzle, microwave it for 10-15 seconds. For extra decadence, mix a tablespoon of heavy cream into the warmed cookie butter before drizzling.













